How to install MooseFS

After preparation, you are ready for the installation process. With this article, you install Master Server, Chunkserver, MooseFS CGI, MooseFS CLI, Metalogger and MooseFS client.
This article is part of MooseFS installation guide :
- How to set up a DNS server for MooseFS on Debian/Ubuntu
- Things to do before installing MooseFS
- How to install MooseFS
- MooseFS basic usage
For the purpose of these articles, we will assume that your machines have following IP addresses:
- Master Servers:
- Leader: 192.168.1.1
- Follower/Metalogger: 192.168.1.2
- Chunkservers:
- 192.168.1.101
- 192.168.1.102
- 192.168.1.103
- Clients (Users’ computers):
- 192.168.2.x
In this tutorial, it is assumed, that you have MooseFS Community Edition. If you want to install MooseFS Pro, please use ’pro’ in package names, e.g.: moosefs-pro-master instead of moosefs-master.
It is also assumed, that you have Debian/Ubuntu installed on your machines. If you have another distribution, please use the appropriate package manager instead of apt.
Notice, that most of the commands below you have to run as root. The easiest way to become root is to run:
sudo su -
Master Server(s) installation
Warning: Configuration files on all Master Servers must be consistent!
In MooseFS Master Server (and also other modules) installation can be accomplished by running the command listed below:
apt install moosefs-master
Sample configuration files will be created in /etc/mfs with the extension *.sample (MooseFS 3.0+) or *.dist (MooseFS 2.0). Use these files as your target configuration files:
cd /etc/mfs
cp mfsmaster.cfg.sample mfsmaster.cfg
cp mfsexports.cfg.sample mfsexports.cfg
If you would like to change any of the settings you should uncomment the appropriate line and set a different value. For the lines which are commented the system will use built-in default values, i.e. those listed in commented lines.
File named mfsmaster.cfg contains Master Server settings. You can find out more information about this file in the man pages (man mfsmaster.cfg).
File mfsexports.cfg specifies which users’ computers can mount the file system and with what privileges. For example, to specify that only machines addressed as 192.168.2.x can use the whole structure of MooseFS resources (/) in read/write mode, in the first line which is not commented out change the asterisk (*) to 192.168.2.0/24, so that you’ll have:
192.168.2.0/24 / rw,alldirs,maproot=0
If you are setting up MooseFS Pro, at this point place a proper mfslicence.bin file into /etc/mfs directory:
cp /path/to/mfslicence.bin /etc/mfs
The mfslicence.bin file must be installed on all Master Servers. The mfslicence.bin file presence is not required on Community Edition Master Server.
If you want MooseFS Master Server to start automatically during system boot, edit /etc/default/moosefs-master and set MFSMASTER_ENABLE variable to true):
MFSMASTER_ENABLE = true
At this point it is possible to run the Master Server (using the standard way to run services):
systemctl start moosefs-master.service
or:
mfsmaster start
To install second (third, etc.) Master Server just repeats steps listed above on another machine (Pro only).
MooseFS CGI and CGI Server installation
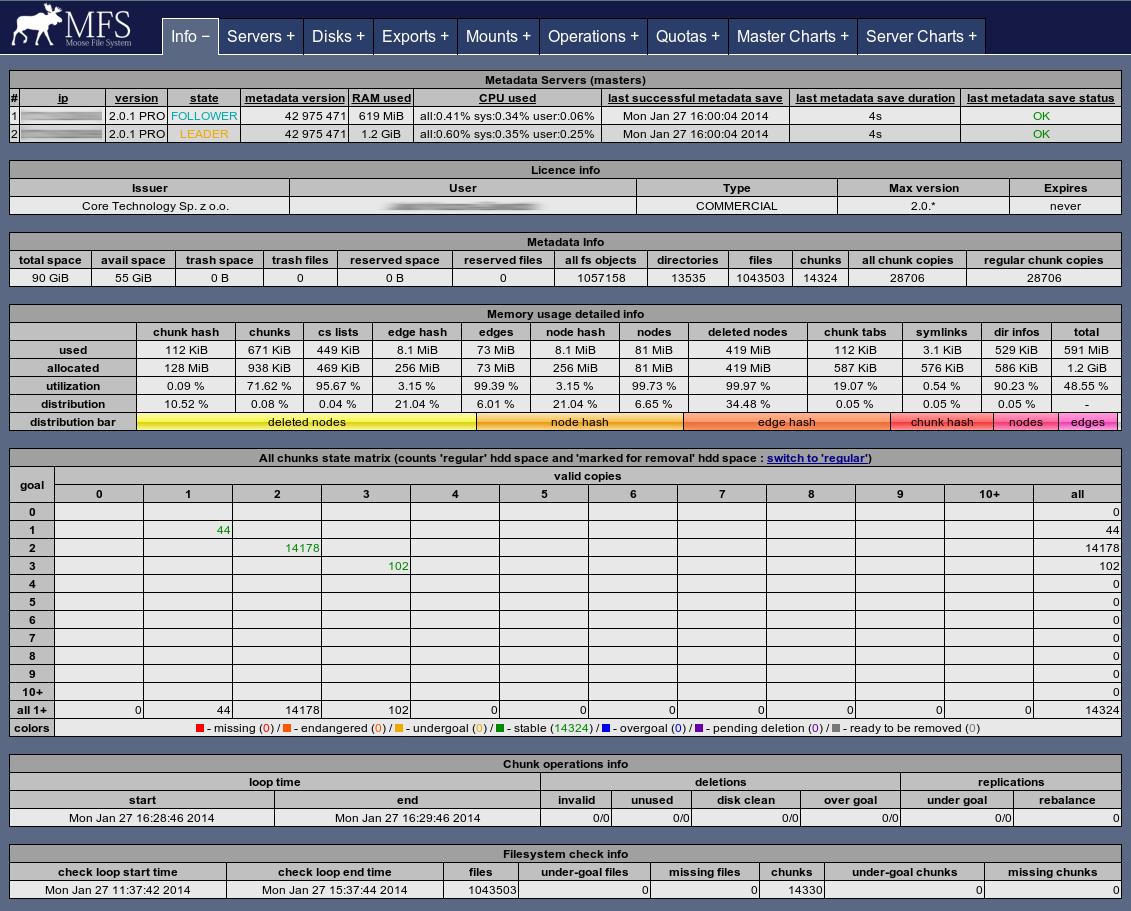
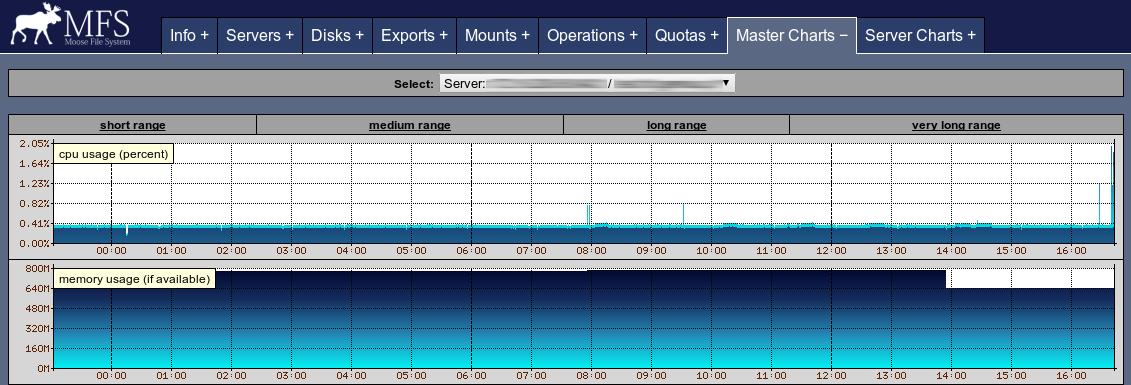
MooseFS CGI monitor interface is used to let user observe and analyse current MooseFS status (as you can see on screenshots presented below):


We recommend installing MooseFS CGI and CGI Server on all Master Servers.
apt install moosefs-cgiserv
apt install moosefs-cgi
If you want MooseFS CGI Server to start automatically during system boot, edit /etc/default/moosefs-cgiserv and set MFSCGISERV_ENABLE variable to true):
MFSCGISERV_ENABLE = true
You can now run CGI Monitor Server:
# systemctl start moosefs-cgiserv.service
or:
# mfscgiserv start
Information should now be available in your CGI Monitoring Interface at http://192.168.1.1:9425 (for the moment there will be no data about Chunkservers).
MooseFS CLI installation
MooseFS Command Line Interface (CLI) tool allows you to see various information about MooseFS status. This tool has many options, which allow you to check all the information you can see in your CGI, but from the command line, so it is possible to use MooseFS CLI in scripts. You can list all the options by invoking the tool with -h or –help switch or check it at https://moosefs.com/manpages/mfscli.html. E.g. mfscli with -SIN option will display basic info similar to the ”Info” tab in CGI.
We recommend installing MooseFS CLI on all Master Servers:
apt install moosefs-cli
Metadata backup servers (Metaloggers) installation
In MooseFS Pro, when there are at least two Master Servers present, Metalogger is optional, because when the leader master fails, another one takes over its work.
In MooseFS (non-Pro) we strongly recommend to set up at least one Metalogger.
It is recommended that the machine used to install the backup server is as strong as the Master Server (at least in regards to the amount of RAM). In the case of the Master Server failure, after importing changelogs to the metadata file, the Metalogger server can be easily set up to take over functions of the managing server. Issue the following commands to install and configure MooseFS Metalogger with default settings:
apt install moosefs-metalogger
cd /etc/mfs
cp mfsmetalogger.cfg.sample mfsmetalogger.cfg
For our test installation, you’ll leave mfsmetalogger.cfg unchanged. You can find out more information about this file in the man pages (man mfsmetalogger.cfg). In case you have changed the default name mfsmaster to a different one, you need to uncomment and change the MASTER_HOST variable in mfsmetalogger.cfg file.
If you want MooseFS Metalogger to start automatically during system boot, edit /etc/default/moosefs-metalogger and set MFSMETALOGGER_ENABLE variable to true):
MFSMETALOGGER_ENABLE = true
Now you are ready to start the Metalogger service:
systemctl start moosefs-metalogger.service
or
mfsmetalogger start
To install the second (third, etc.) Metalogger you just need to repeat the steps listed above on another machine.
Chunkservers installation
Issue the following commands on the machines which are to be Chunkservers:
apt install moosefs-chunkserver
Now prepare configuration files of the Chunkservers:
cd /etc/mfs
cp mfschunkserver.cfg.sample mfschunkserver.cfg
cp mfshdd.cfg.sample mfshdd.cfg
For our test installation, you’ll leave mfschunkserver.cfg unchanged. You can find out more information about this file in the man pages (man mfschunkserver.cfg). In case you have changed the default name mfsmaster to a different one, you also need to uncomment and change the MASTER_HOST variable in mfschunkserver.cfg file.
It is recommended that they are used exclusively for the MooseFS – this is necessary to manage the free space properly.
Let’s assume, that /dev/sdb and /dev/sdc devices are designated to store chunks. First of all, create a partition table and partition on these devices.
parted --align optimal /dev/sdb
(parted) mklabel gpt
(parted) mkpart mfschunks1 0% 100%
(parted) q
parted --align optimal /dev/sdc
(parted) mklabel gpt
(parted) mkpart mfschunks2 0% 100%
(parted) q
Install XFS Progs:
apt install xfsprogs
Then, format newly created partition with XFS filesystem:
mkfs.xfs /dev/sdb1
mkfs.xfs /dev/sdc1
If you have disks with 4k physical sector size (most of 2 and 4 TiB modern HDDs have 4k physical sector size), instead of the command above, issue:
mkfs.xfs -s size=4k /dev/sdb1
mkfs.xfs -s size=4k /dev/sdc1
Then, add appropriate entries into /etc/fstab:
/dev/sdb1    /mnt/mfschunks1    xfs    defaults    0 0
/dev/sdc1    /mnt/mfschunks2    xfs    defaults    0 0
Create directories for mounting newly created partitions:
mkdir /mnt/mfschunks1
mkdir /mnt/mfschunks2
Mount newly created partitions:
mount /mnt/mfschunks1
mount /mnt/mfschunks2
Change ownership and access rights to mountpoints to let MooseFS Chunkserver write to them:
chown mfs:mfs /mnt/mfschunks1
chown mfs:mfs /mnt/mfschunks2

chmod 770 /mnt/mfschunks1
chmod 770 /mnt/mfschunks2
At this point enter mountpoints at the end of mfshdd.cfg file:
/mnt/mfschunks1
/mnt/mfschunks2
If you want MooseFS Chunkserver to start automatically during system boot, edit /etc/default/moosefs-chunkserver and set MFSCHUNKSERVER_ENABLE variable to true).
MFSCHUNKSERVER_ENABLE = true
Now you are ready to start the Chunkserver:
systemctl start moosefs-chunkserver.service
or:
mfschunkserver start
Repeat the same steps for each Chunkserver you want to use for storing data in MooseFS system. At this point in your CGI Monitoring Interface at http://192.168.1.1:9425, you should be able to see full information about the system including the Master Server and Chunkservers.
Users’ computers (Clients) installation
In order to mount a file system based on MooseFS, it is necessary that users’ computers have FUSE package (at least in version 2.6, recommended ≥ 2.7.2). If it is not present, install it. One of the options is to compile it from sources, or you can install it from repositories on Debian-based systems with the following command:
apt install fuse libfuse2
mfsmount can be installed in the same way as other MooseFS components:
apt install moosefs-client
Let’s assume that you’ll mount the system in a /mnt/mfs folder on a client’s machine. Issue the following commands:
mkdir -p /mnt/mfs
mfsmount /mnt/mfs -H mfsmaster
Now after issuing the df -h | grep mfs command you should get information similar to the following:
/dev/sdb       2.0G  69M  1.9G  4%  /mnt/mfschunks1
/dev/sdc       2.0G  69M  1.9G  4%  /mnt/mfschunks2
mfsmaster:9421 3.2G  0    3.2G  0%  /mnt/mfs
Voila! MooseFS is installed on your cluster.